


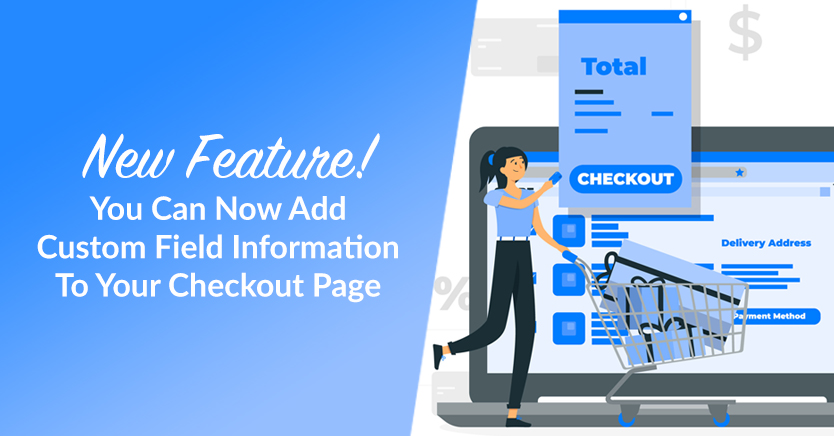
New Feature! You Can Now Add Custom Field Information To Your Checkout Page
Your store’s registration page serves a crucial purpose: it captures vital customer data that you can use to enhance your business in various ways. However, to keep your customers happy, you also need to reassure them that your website can properly store any sensitive information that they provided. This is where our new feature, which lets you add custom field information to your checkout page, comes in.
So, what exactly does this new feature entail, and how can it help your business? Also, how can you use the Wholesale Lead Capture plugin to show your customers’ custom field information on your store’s checkout page?
Let’s find out, shall we?
Add Custom Field Information To Your Store’s Checkout Page: The New Feature In Brief
By default, the Wholesale Lead Capture registration form gathers information such as the customer’s name, email address, company name, and the like. However, as our Getting Started Guide states, Wholesale Lead Capture’s Custom Fields feature lets you collect additional information. For example, you can ask registrants for their TAX ID or an extra email address.
Most people don’t enjoy giving away such sensitive data especially if they have to do it more than once. Thus, you can alleviate your customers’ anxieties by proving to them that your website can safely store all the information that they provide.
And how can you do this? Simple: by showing this data to each customer upon checkout.
We’ve prepared a step-by-step guide on how to add custom field information to your store’s checkout page (you can find it further below). But first, let’s discuss why this small feature can have a big impact on your business.

Customer Satisfaction: How Showing Customer Data On The Checkout Page Can Help
What’s customer satisfaction? As Survicate states:
Customer satisfaction is a measurement that determines how well a company’s products or services meet customer expectations. It’s one of the most important indicators of purchase intentions and customer loyalty. As such, it helps predict business growth and revenue.
Thus, if you want your business to thrive, you must keep your customers happy. Simply put, showing customers that your website can properly store their data can boost customer satisfaction.
Let’s look at some of the ways customer satisfaction can benefit your business.
1. Customer satisfaction can promote customer loyalty
The happier your customers are with your store, the more likely they are to keep doing business with you. After all, positive experiences can create trust in your company, thereby boosting your customers’ loyalty toward you.
According to research, obtaining a new client is 5 to 25 times more costly than keeping an existing one. Therefore, it’s in your best interest to ensure that your customers stay loyal to you. And you can make them happy by giving them positive experiences – such as showing them that their info is safe and secure with you.

2. Dissatisfied customers leave without hesitation
Is a customer unhappy with you? Then don’t be surprised when they walk away without even saying goodbye. Sadly, their departure is not only a loss for you but also a gain for your competitors.
According to Forbes:
Marketing research has discovered that it takes 12 positive experiences to repair the damage caused by a single unresolved negative one. In today’s competitive business environment, even one negative experience is enough to lose a customer forever because people now are less tolerant toward poor encounters than ever before.
Therefore, don’t annoy your customers by making them wonder if you’ve lost their data; show this data on the checkout page to ensure it’s safe with you!

3. Satisfied customers help attract new customers
When people are happy, they like to talk. So if they’re happy with your store, there’s an excellent chance they’ll tell others about you!
In other words, customer satisfaction can kickstart a word-of-mouth advertising campaign. This is when happy customers promote your business to other people, who may then become your new customers. According to Nielsen research, 92% of consumers trust recommendations from family and friends more than marketing activities.
On top of that, word-of-mouth advertising is absolutely free!
In addition, consumers who are happy with your company will likely write glowing reviews about your products. Such positive feedback can encourage anyone to give your store a try. In fact, reviews can be so effective at attracting new customers that it’s often a good idea to ask your buyers to leave reviews on your page!
Check out our other strategies on how to increase customer happiness and convenience!

How To Show Custom Field Information On The Checkout Page (In 3 Easy Steps)
Now that we’ve explored some of the ways customer satisfaction can enhance your business’ performance, let’s jump into how you can show custom field information on your store’s checkout page.
The following tutorial requires the use of the WooCommerce e-commerce platform as well as our Wholesale Lead Capture plugin. Therefore, we suggest purchasing, installing, and activating both tools before proceeding.
In addition, we recommend reading our article, “How To Implement Customer Registration (In 3 Easy Steps)” to get you up to speed on how to create a customer registration form.
With that in mind, let’s get started!
Step 1: Navigate to the Wholesale Lead settings
In your WordPress dashboard, navigate to Wholesale > Lead Capture. Alternatively, you can go to WooCommerce > Settings, then click the Wholesale Lead tab.
Next, click the Custom Fields tab.

The Custom Fields tab lets you create your own unique fields so that you can ask customers for additional information. For instance, if you want a customer to tell you their hair color, you can create a field called “Hair Color.” Of course, we suggest coming up with fields that are relevant to your business!
Here are a few useful custom fields you can create:
- Tax/vat number
- Company registration documents
- Website URL
- Communication preferences
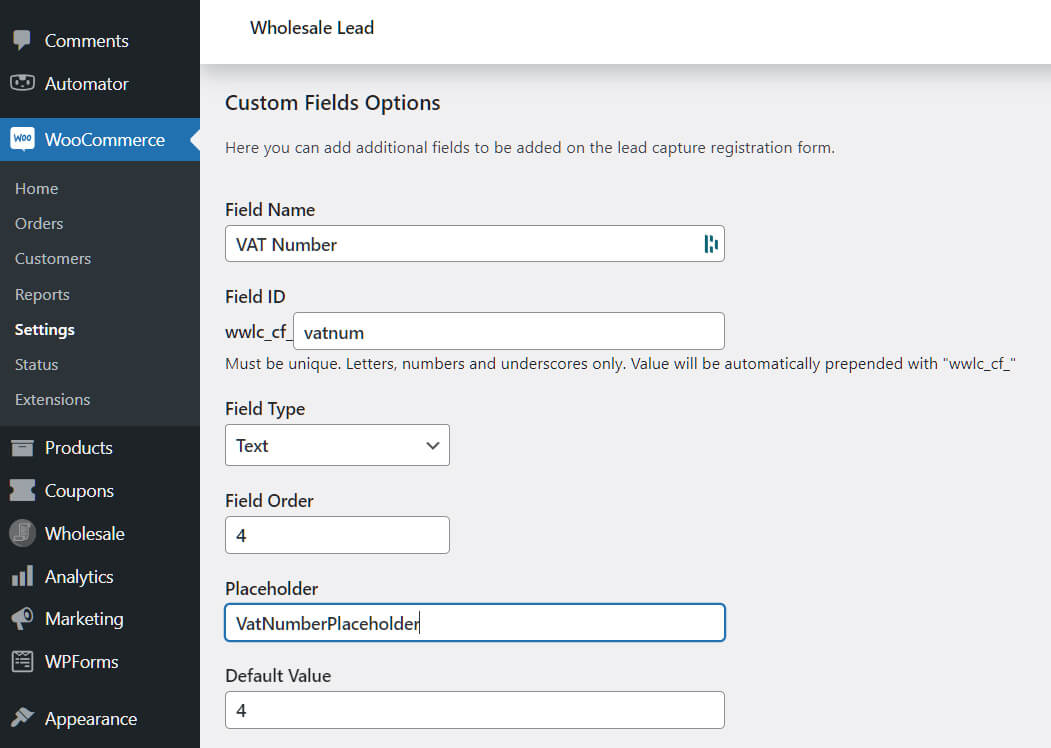
Once you’ve created a new custom field, you’re ready for the next step.
Step 2: Ensure all custom field information shows on the checkout page
The next step is super easy! Simply scroll down the page until you see the Show on Checkout Page button, then check it.
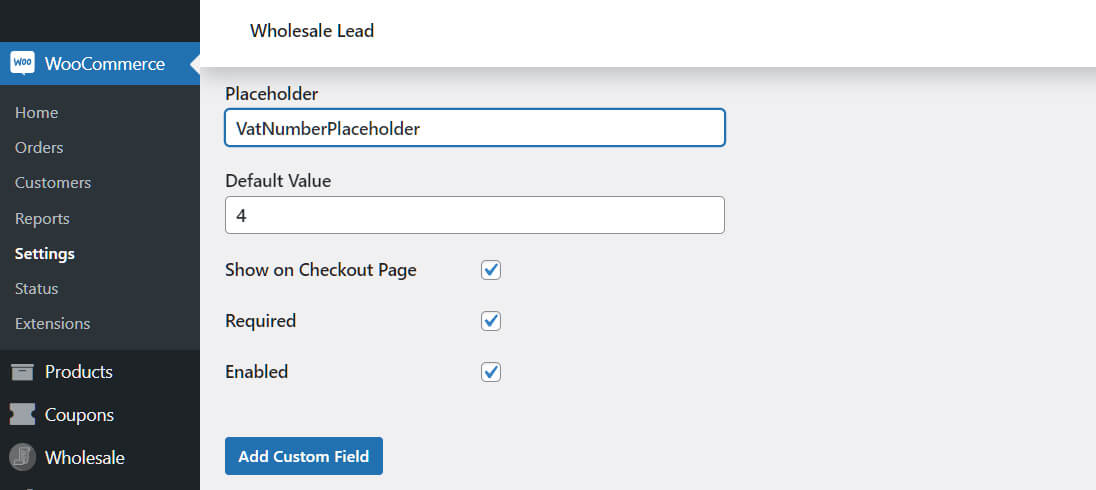
This ensures that the information a customer enters in your custom field during registration also appears on the checkout page once they’re ready to complete their purchase. The checkout page will display said information along with information gathered by Built-in Fields such as First Name, Last Name, Email Address, and the like.
Consider checking the Required and Enabled buttons, too. With the former checked, the user must fill in the custom field before they can complete their registration. On the other hand, the latter makes sure the field is active on the registration page.
Last but not least, click the blue Add Custom Field button below the page. This will apply all the changes you’ve made and make sure they’re activated on the registration and checkout pages.
Step 3: Add more custom fields (optional)
Clicking the Add Custom Field button does two things. First, it saves the custom field you created, then adds it to the table below the page. If you need to edit or delete this field, simply head to the rightmost side of the table, then click the edit or delete buttons.
Secondly, clicking the Add Custom Field button removes all the information you entered on this page. But don’t worry! As discussed above, this data is stored in the table below, so you can always go back to it by clicking the edit button.
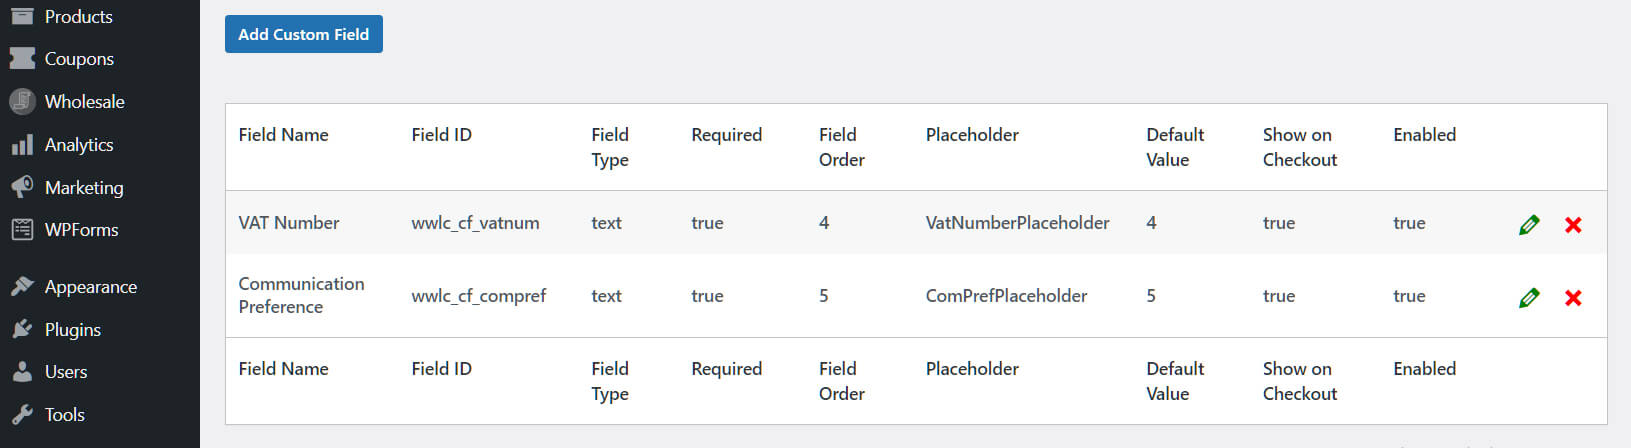
The reason the information is wiped from the page is so that you can enter new information you need to create a new custom field. Simply repeat Step 2 every time you want to create a new custom field.
Conclusion: Add Custom Field Information To Your Checkout Page To Increase Customer Satisfaction
To ensure customer satisfaction, you must reassure your customers that you can safely store all the information that they offered during registration. Of course, this should include information you collected via the unique custom fields you created.
Thankfully, the new feature we discussed today lets you show said information on your store’s checkout page.
To recap, you can add custom field information to the checkout page in three easy steps:
- Navigate to the Wholesale Lead settings
- Ensure all custom field information shows on the checkout page
- Add more custom fields (optional)
Do you have any questions regarding how to add custom field information to your store’s checkout page? How about Wholesale Lead Capture – the WooCommerce plugin that lets you create custom fields for your lead capture registration form? Let us know in the comments section below!
The post New Feature! You Can Now Add Custom Field Information To Your Checkout Page appeared first on Wholesale Suite.