


How To Automatically Delete Or Retain Rejected Users (In 2 Steps)
As a wholesale store owner, it’s normal for businesses to approach you in the hopes of becoming your wholesale customers. However, the harsh reality is that you won’t want to work with everyone who registers on your website. This is where it helps to have a system that can either 1) automatically delete rejected users from your website database, or 2) temporarily retain said users in said database.
Thankfully, modern e-commerce tools grant business owners plenty of ways to deal with potential wholesale customers. Case in point, Wholesale Lead Capture boasts a nifty feature called Auto Remove User After Rejection, which significantly simplifies the user rejection process.
In today’s article, we’ll discuss the benefits of automatically removing or retaining rejected users. Then, we’ll show you how you can implement either method in your WooCommerce website.
So let’s dive in!
2 Ways To Manage Rejected Users
Wholesale Lead Capture’s Auto Remove User After Rejection feature gives you two options to manage rejected users:
1. Automatically delete users after rejection
Let’s say a user registers on your website but doesn’t meet your standards as a wholesale customer. What should you do?
Wholesale Lead Capture lets you automatically delete registrants and all their details from your website database. This declutters the database and saves you the trouble of manually removing rejected users from your system.
This can be especially helpful if you typically reject a lot of aspiring wholesale customers. Sure, you have the option to bulk delete these users, but automatic deletion is still the faster and more convenient way to deal with them.

2. Automatically put users in the “Rejected” user role after rejection
What if you accidentally reject a potential wholesale customer?
If you set your website up to automatically delete rejected users, then the only way to get their information back is to have them go through the wholesale customer registration process again. This can cause the user extreme frustration and irritation, discouraging them from reapplying. The result? You lose a valuable lead!
However, by putting a rejected user in the “Rejected” user role instead, you avoid deleting their details from your database. Thus, all you need to do to correct your mistake is change their role from “Rejected” to any other role.
For example, you can assign the “Wholesale Customer” role to them if they already meet your standards.
Alternatively, you can give them the “Unapproved” role if you need more time to examine their credentials and reconsider their application. This could even be an opportunity for the user to provide you with more information about their business. Then, if you ever change your mind about them, you could approve their application so that they can work with you as a wholesale customer.
Our 2-Step Guide On How To Automatically Delete Users Or Put Them In The “Rejected” Role After Rejection
So, how do you automatically delete rejected users? Alternatively, how do you keep them in your database by putting them in the “Rejected” user role?
First of all, you’re going to need the WooCommerce plugin for your WordPress website. A popular e-commerce platform, WooCommerce enables the creation of online stores with e-commerce functionality. This tool is free to download and install.
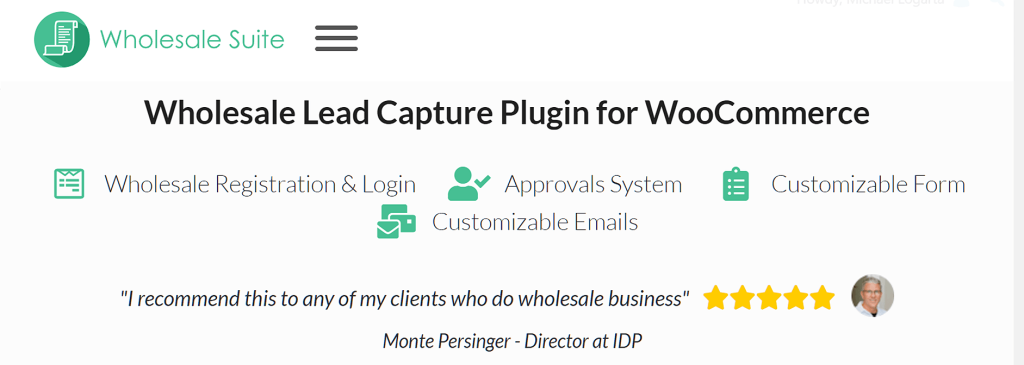
Secondly, you’ll have to purchase and install Wholesale Lead Capture, a WooCommerce extension that automates the recruitment and registration of wholesale customers. It boasts plenty of powerful features, including a registration form builder, email notification automation, and a complete user approval system.
In the guide below, we’ll show you how to use Wholesale Lead Capture to:
- Automatically delete users after rejection
- Automatically put users in the “Rejected” user role after rejection
And so, without further ado, let’s get this tutorial started!
Step 1: Navigate to the Wholesale Lead Capture settings
The first thing you need to do is head to the Wholesale Lead Capture settings.
While on your WordPress dashboard, click WooCommerce > Settings. Then, select the Wholesale Lead tab and the General sub-tab.
Alternatively, you can click Wholesale > Lead Capture, then the General sub-tab.

Now, onto the next step!
Step 2: Enable or disable the Auto Remove User After Rejection option
Scroll down to the Auto Remove User After Rejection option. Take note of its checkbox and description.
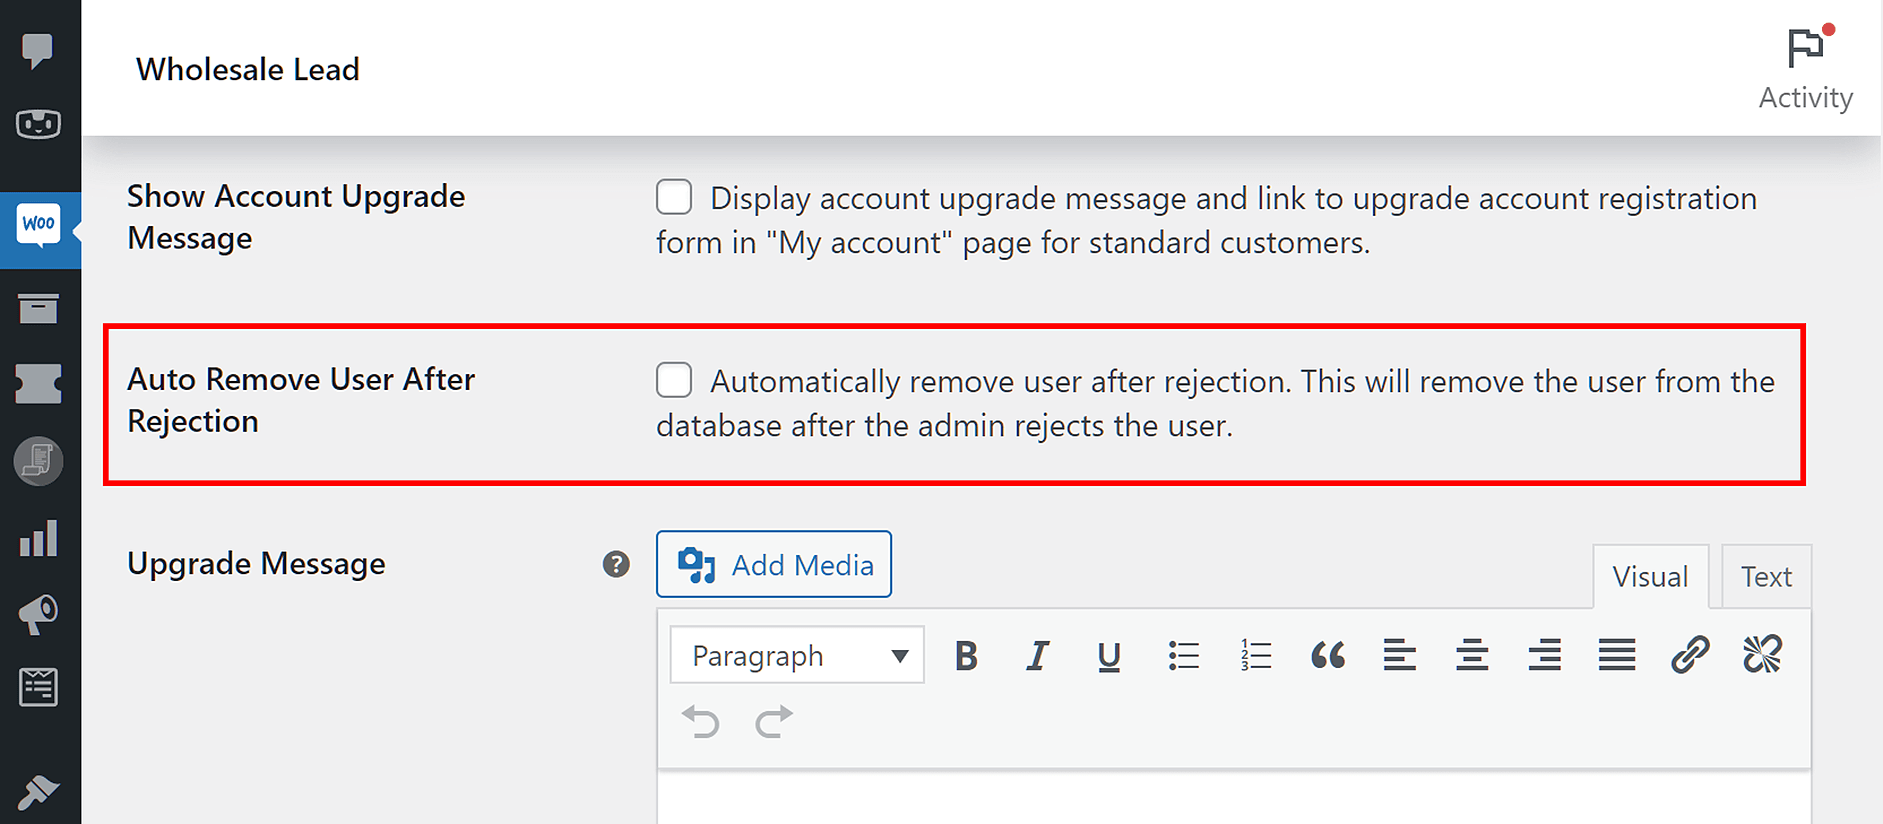
If you want the system to automatically delete a user after you reject them, enable this option by ticking the checkbox. This will remove the rejected user and all their details from your database. If they want to try registering again, they’ll have to reenter those details.
However, if you leave the checkbox unticked, the option remains disabled. As a result, the user gets assigned to the “Rejected” user role after you reject them, instead. This means you retain all their details. You can even change their user role whenever you wish.
Once you’ve made your selection, scroll down and click the Save Changes button to activate your settings.
And that’s it!
Testing The Auto Remove User After Rejection Option
This is an optional yet important part of the tutorial. Basically, it will show you how to test if your settings for the Auto Remove User After Rejection option are working.
Step 1: Register as a new user
Using the Wholesale Lead Capture registration form you’ve created, register on your website as a new lead. In the next steps, we will be rejecting this user.
For detailed information on how to create a registration form, check out the following guides:
- Why You Need A Simple Registration Form And How To Create One For Your Wholesale Store
- How To Implement Customer Registration (In 3 Easy Steps)
Step 2: Log in as an admin and navigate to your list of unapproved users
Now, log into your website as an admin. Then, head to your WordPress dashboard and click Users > All Users.
Here, you’ll find a list of all your website users, including those who have registered but are still waiting for your approval. On this list, unapproved users are described as “Unapproved” in the Role and Status columns.
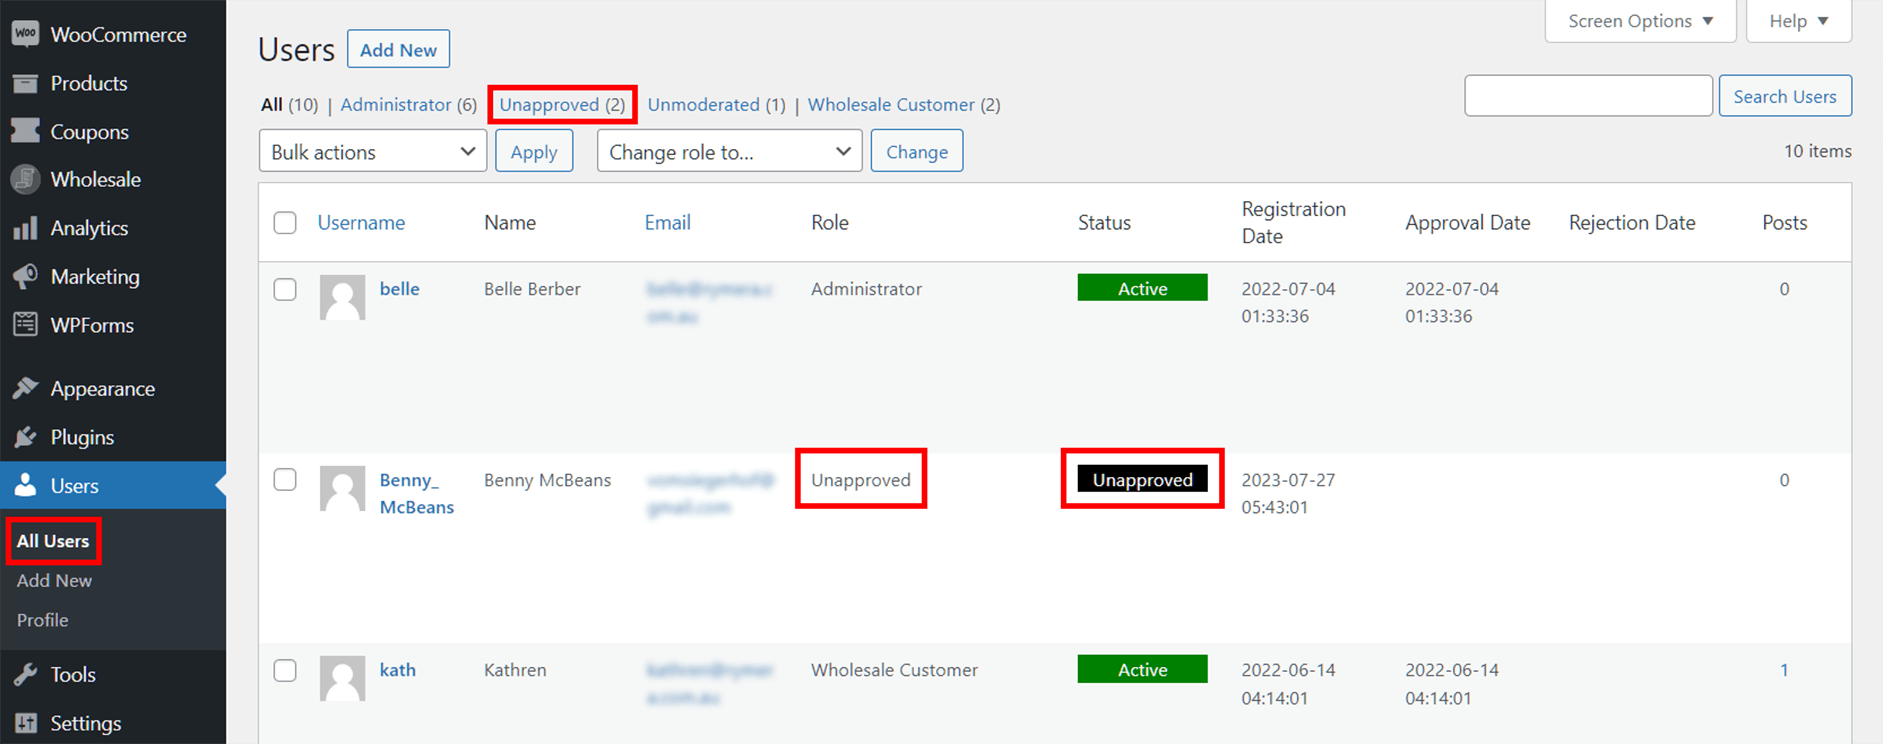
To simplify your search for the newly created user that you want to reject, click the Unapproved tab, which lists all the users who have yet to be approved.
Step 3: Reject the user
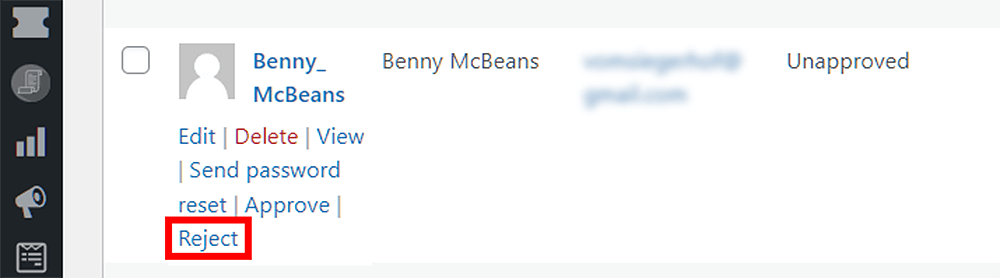
Hover your mouse cursor over your newly created user’s username to reveal various options. Then, click the Reject option.
If the Auto Remove User After Rejection option is enabled, the system will remove the user and all their data from the database.
On the other hand, if the option is disabled, the user will remain on the list as a “Rejected” user.
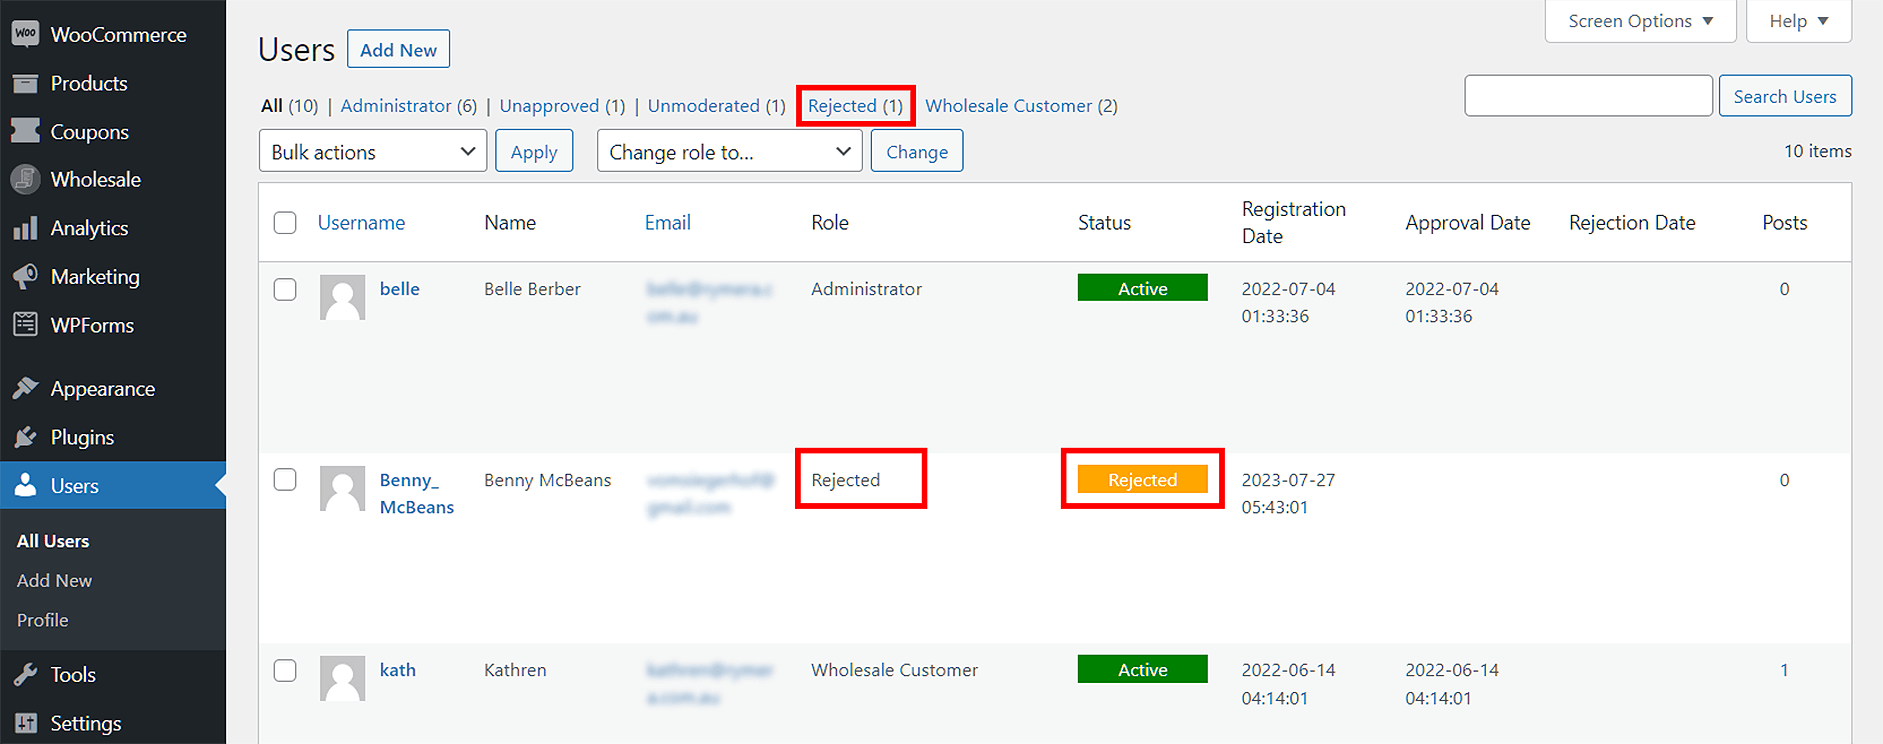
You will see their “Rejected” status in the Role and Status columns. There should also be a “Rejected” tab that lists all the users you haven’t approved.
Conclusion
Managing rejected users is crucial for your wholesale business. Thankfully, Wholesale Lead Capture gives you two ways to deal with such users.
For one thing, it can let you automatically delete rejected users, which conveniently and immediately cleans your website’s database of unnecessary clutter.
For another, it can let you assign the “Rejected” user role to rejected users. This provides a quick fix for the accidental deletion of applicants. In addition, it gives you more time to study and reconsider your application.
To automatically delete or put rejected users in the “Rejected” user role, use Wholesale Lead Capture to complete the following steps:
- Navigate to the Wholesale Lead Capture settings
- Enable or disable the Auto Remove User After Rejection option
To test if Auto Remove User After Rejection is working, complete the steps below:
- Register as a new lead
- Log in as an admin and navigate to your list of unapproved users
- Reject the user
Do you have any questions about how to automatically delete rejected users from your database? How about how to assign the “Rejected” user role to them, instead? Let us know in the comments section below!
The post How To Automatically Delete Or Retain Rejected Users (In 2 Steps) appeared first on Wholesale Suite.